Tiny But Mighty? TRYMAG Small Neodymium Magnets Review: The Best Mini Magnets for Crafts & Home?
TRYMAG Small Neodymium Magnets reviewed: multi-size assortment, Ni-Cu-Ni plating, and step-by-step guides for Warhammer magnetizing, 3D printing, and woodworking.
Check Price on AmazonProduct Details & Features
Forget weak, sliding fridge magnets that can barely hold up a single grocery receipt. If you are a crafter, a tabletop gamer, a 3D printing enthusiast, or a homeowner trying to optimize your living space, you need industrial-grade holding power in a microscopic footprint. Enter the world of rare-earth neodymium.
The TRYMAG Small Neodymium Magnets are engineered for precision. Delivering staggering pull force relative to their miniature size, this multi-pack of varying dimensions is the ultimate utility belt for DIY projects. Whether you are magnetizing the weapon loadouts on a Warhammer 40k Dreadnought, building hidden closures for custom wooden jewelry boxes, or designing a floating spice rack for a minimalist kitchen, these tiny metallic discs offer uncompromising strength.
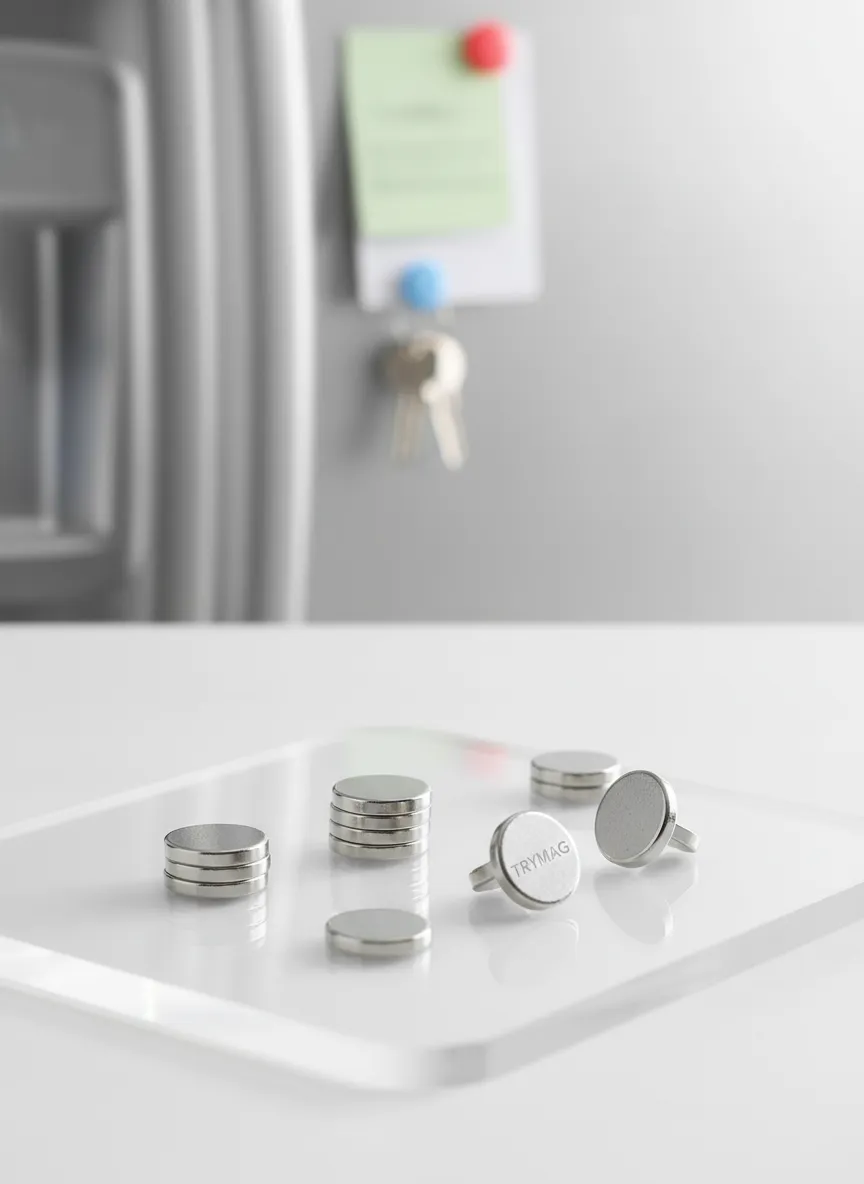
Standard ferrite magnets lose their magnetism over time and shatter under pressure. TRYMAG utilizes premium rare-earth elements coated in a triple-layer Ni-Cu-Ni (Nickel-Copper-Nickel) plating, ensuring maximum durability, corrosion resistance, and a brilliant silver finish. You are not just buying magnets; you are buying the invisible structural integrity for your most delicate and demanding projects.
The Science of Small: Why Neodymium Changes Everything
To understand why the TRYMAG Small Neodymium Magnets are so much better than what you find at a local dollar store, we have to talk about magnetic flux density. Neodymium (NdFeB) is a rare-earth alloy that currently holds the title for the strongest permanent magnet material commercially available.
Unlike ceramic magnets, which are bulky and brittle, neodymium can be machined into discs as thin as a millimeter while still maintaining enough “pull force” to snap through layers of plastic or resin. This is why they are the gold standard for miniature magnetizing in the wargaming world. When you are working with a $150 resin model, you can’t afford a magnet that “might” hold. You need the absolute certainty of high-grade rare earth.
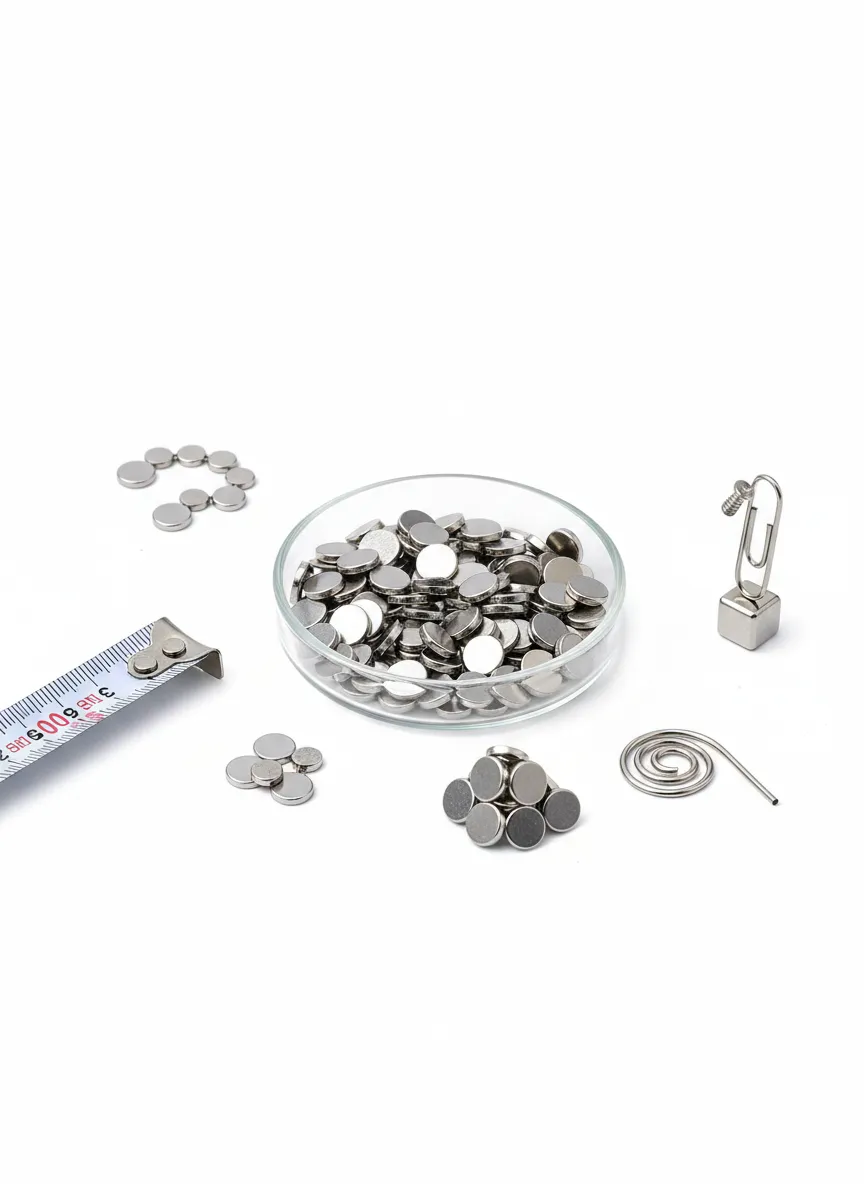
Product Overview: The TRYMAG Multi-Size Arsenal
The TRYMAG Neodymium Miniature Magnet multi-pack is a highly curated assortment of micro-magnets designed specifically for high-detail work. Unlike bulk packs that force you into a single size, TRYMAG provides a graduated selection of diameters and thicknesses. This allows you to match the exact pull force and dimensional constraints of your project without compromising on design.
For Resin 3D Printing Enthusiasts, these magnets are a godsend. They slide perfectly into pre-modeled negative spaces, allowing for modular terrain, interchangeable action figure parts, and snap-fit mechanical prototypes. When paired with high-quality UV Curing Stations and rigid Standard Photopolymer Resin, these magnets complete the professional-grade manufacturing loop right on your desktop.

Tabletop gamers rely heavily on the TRYMAG assortment. Magnetizing a miniature requires surgical precision. A magnet too large will destroy the plastic arm of a miniature; a magnet too small won’t hold the heavy pewter or plastic weapon. TRYMAG provides the exact tolerances needed to use a standard Army Painter Pin Vise to drill a flush hole, drop in a dot of Loctite Ultra Gel Control, and secure the magnet for a lifetime of tabletop warfare.
Key Features & Benefits: Why TRYMAG Leads the Pack
1. Unmatched Rare-Earth Pull Force (N52 Grade Performance)
Neodymium is the strongest type of permanent magnet commercially available. TRYMAG utilizes a high-grade magnetic alloy that generates a dense magnetic field. A magnet barely the size of a grain of rice can easily hold through layers of Cardstock Paper, thick Acrylic Paint or thin veneers of wood. This allows for “invisible” closures in craft projects where you want the magic of magnetism without seeing the metal.
2. Triple-Layer Ni-Cu-Ni Plating for Maximum Durability
Raw neodymium oxidizes quickly and is highly susceptible to corrosion. It can literally turn to dust if exposed to high humidity without protection. TRYMAG mitigates this by electroplating every single magnet with a robust Nickel-Copper-Nickel coating. This triple-layer shield provides:
- Corrosion Resistance: Crucial if you are using these for kitchen organization or in humid environments.
- Structural Reinforcement: Neodymium is inherently brittle. The metallic plating acts as an exoskeleton, reducing the chance of chipping when the magnets snap together.
- Smooth Surface: The mirror-like finish is visually appealing and creates a perfect surface for Cyanoacrylate Super Glue or Two-Part Epoxy to bond against.
3. The Ultimate Multi-Size Assortment for Every DIY Scenario
One size never fits all in the DIY world. The TRYMAG kit includes multiple dimensions.
- Micro (1mm - 2mm): Perfect for the wrists of 28mm miniatures, securing delicate Papercraft Templates, or creating tiny Magnetic Clasps for custom jewelry.
- Small (3mm - 4mm): The workhorse size. Ideal for Warhammer 40k vehicle turrets, custom Pegboard Accessories, and holding up Heavy Duty Watercolor Paper on a magnetic easel.
- Medium (5mm+): Strong enough for hidden cabinetry closures, organizing Metal Hand Tools on a rack, or mounting LED Puck Lights under kitchen cabinets.
4. Seamless Workflow Integration
Because these are standard geometric discs, they integrate flawlessly into your existing toolkit. You don’t need proprietary tools. Standard metric HSS Drill Bits or a precision Forstner Bit Set will create the perfect housing for these magnets.

Deep Dive: Mastering the Art of Miniature Magnetism
To truly understand why the TRYMAG Small Neodymium Magnets are dominating the crafting space, we have to look at how they are used by professionals.
For the Tabletop Gamer & Miniatures Painter
If you play tabletop wargames like Warhammer 40,000, Star Wars: Legion, or Dungeons & Dragons, you know the pain of the “meta” changing. Today, your tank needs a laser cannon; tomorrow, it needs a missile launcher. Gluing your weapons means you are stuck. Magnetizing miniatures is the ultimate solution.
Here is the professional workflow using TRYMAG magnets:
- Preparation: Use a high-quality Hobby Knife to flatten the joint surface.
- Marking: Use a Sharpie Fine Point Marker to mark the dead center of the joint.
- Drilling: Take a Precision Hand Drill loaded with a drill bit exactly matching the TRYMAG magnet’s diameter (e.g., a 2mm bit for a 2mm magnet). Drill a shallow hole. Use Digital Calipers to ensure the depth is perfect.
- Polarity Check: This is the most critical step. If you glue a magnet in backward, it will repel the weapon arm. Use a master stick of magnets to ensure your polarities always align across your entire army.
- Adhesion: Apply a micro-drop of Zap-A-Gap CA Glue. Slide the TRYMAG magnet in from the side to avoid air bubbles.
- Acceleration: Spray a tiny mist of CA Glue Accelerator to instantly cure the bond.
- Finishing: Once cured, you can prime right over it with Vallejo Surface Primer and paint it with Citadel Layer Paints using your finest Kolinsky Sable Brushes.
For the Custom Woodworker & Fine Artist
Traditional brass clasps and latches can ruin the sleek, minimalist aesthetic of a modern wooden box or jewelry case. TRYMAG magnets allow for invisible, satisfying closures that feel premium and modern.
- Routing/Drilling: Use a Compact Router or a drill press with a Brad Point Drill Bit to create a recess just 0.5mm below the surface of the wood.
- Mounting: Embed the TRYMAG magnet using Gorilla Wood Glue mixed with fine sawdust for a seamless fill, or strong JB Weld Clear Epoxy.
- Veneering: For a truly “magic” look, glue a paper-thin wood veneer over the magnet using heavy Bar Clamps.
- Finishing: Sand it flush with 3M Sandpaper and apply your favorite Danish Oil Finish. The result? A box that snaps shut with a satisfying ‘thud’ despite no visible hardware.
For Home Organization & Smart Kitchen Hacks
Tired of cluttered countertops and overflowing junk drawers? These magnets turn vertical space into high-efficiency storage.
- Floating Spice Racks: Superglue TRYMAG magnets to the inside lids of small Hexagon Glass Jars. Stick them to a Stainless Steel Wall Plate mounted under your cabinets. Use a Dymo Label Maker to keep everything organized.
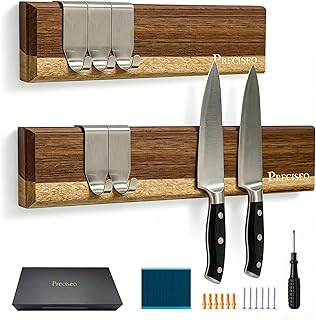
- The Ultimate Tool Wall: Mount a sheet of galvanized steel in your garage or craft room. Use these magnets to hold Screwdriver Sets, Allen Wrenches, and Wire Strippers exactly where you need them.
- Minimalist Office: Ditch the bulky plastic fridge magnets. Use a single tiny TRYMAG to pin important documents to your Magnetic Glass Whiteboard alongside your Expo Dry Erase Markers.
Crucial Handling & Safety Advice: Respect the Pull Force
Because neodymium is so powerful, it requires respect. These are industrial-grade components, not toys.
- The “Snap” Hazard: If you let two TRYMAG magnets snap together from even a few inches away, the sheer force of the impact can cause the Ni-Cu-Ni plating to chip or the magnet itself to shatter. Always slide them apart laterally, rather than pulling them straight apart.
- The Tweezer Trick: For the 1mm and 2mm sizes, human fingers are too clumsy. You will end up with magnets stuck to your fingernails or lost in the carpet. Invest in a pair of Anti-Magnetic Ceramic Tweezers or Brass Tweezers to handle them without the tool itself becoming magnetized.
- Electronics Interference: Keep these away from pacemakers, mechanical watches, and magnetic storage media like old credit cards or hard drives.
- Child & Pet Safety: WARNING: CHOKING AND INGESTION HAZARD. If two or more magnets are swallowed, they can attract each other through intestinal walls, causing fatal complications. Keep them stored safely in small Plastic Organizer Boxes far out of reach of children and pets.
Advanced Techniques: Embedding Magnets in 3D Prints
If you own a 3D printer like the Bambu Lab P1S or Prusa MK4, you can achieve “magical” functionality by embedding TRYMAG magnets inside the plastic.
- Modeling the Cavity: In Fusion 360 or Blender, create a cylindrical hole that is exactly 0.2mm wider and 0.1mm deeper than your TRYMAG magnet. This accounts for filament “squish.”
- Slicer Pause: In your slicer (Cura, PrusaSlicer, OrcaSlicer), find the layer where the cavity is about to be closed. Add a “Pause at Layer” command.
- The Drop: When the printer pauses, drop the TRYMAG magnet into the hole. Pro Tip: Apply a tiny dab of Stick Glue to the bottom of the hole first so the magnet doesn’t vibrate or jump up toward the metal nozzle of your printer.
- Resume: Resume the print. The nozzle will extrude plastic right over the magnet, permanently sealing it inside. You now have a 3D printed part with invisible magnetic properties.
Technical Specifications & Companion Gear
Here is how the TRYMAG multi-pack breaks down, along with essential companion gear you’ll need to maximize their utility.
| Feature / Accessory | Detail / Application | Check Price |
|---|---|---|
| Material Base | Rare Earth Neodymium Alloy (NdFeB) | View Magnets |
| Plating | Triple Layer Ni-Cu-Ni (Nickel-Copper-Nickel) | View Rust Inhibitors |
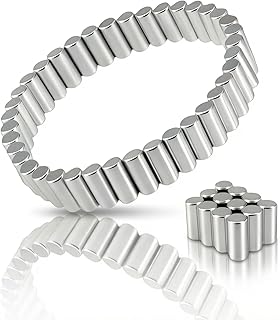
| Shape | Precision Disc / Cylinder | View Calipers |
| Best Adhesive | Cyanoacrylate (CA) Glue (Gel type preferred) | View Super Glue |
| Best Applicator | Micro-tip glue extenders | View Micro Tips |
| Installation Tool | Pin Vise / Hand Drill | View Pin Vises |
| Hole Cleanup | Miniature needle files | View File Sets |
| Gap Filling | Epoxy putty (Green Stuff) around the magnet | View Green Stuff |
| Marking Polarity | Fine point permanent markers | View Sharpies |
| Storage | Non-magnetic compartment boxes | View Organizers |
Pros & Cons: An Honest Review
Top Features (Pros):
- Incredible strength-to-size ratio: Vasti outperforms standard ferrite or ceramic magnets.
- Assorted sizes in one pack: Eliminates the need to buy multiple bulk packages for a single complex project.
- Smooth, highly polished Ni-Cu-Ni plating: Resists rust and looks premium on exposed projects.
- Perfectly calibrated dimensions: Fits snugly into holes drilled by standard metric drill bits.
- Ideal for high-end hobbies: Including custom mechanical keyboards (pairing with Krytox Lube), dioramas, and scale modeling.
Considerations (Cons):
- Brittle Nature: Like all neodymium magnets, they are inherently brittle. Allowing them to crash together from a distance will cause chipping.
- Difficult Handling: The smaller 1mm and 2mm sizes are extremely difficult to separate by hand without Non-Marring Pliers or a craft knife.
- Strict Safety Requirements: Must be kept strictly away from young children and pets due to severe internal injury risks if swallowed.

Essential Crafter’s Toolkit Add-Ons
If you are buying TRYMAG magnets, you are likely working on a project that demands precision. Don’t sabotage your high-quality magnets with low-quality tools. Here is what the pros keep on their workbench alongside these magnets:
- The Cutting Mat: A Self-Healing Cutting Mat protects your desk and provides metric grid lines for perfect magnet spacing.
- Lighting: You cannot work with 2mm magnets in the dark. An LED Magnifying Desk Lamp ensures you never glue a magnet in backward.
- Tape: Sometimes you need a temporary hold before the glue sets. High-quality Tamiya Masking Tape or standard Blue Painter’s Tape is essential for marking polarity.
- Cleanup: Cyanoacrylate glue is messy. Keep Acetone and Microfiber Cleaning Cloths nearby to clean up spills before they ruin your project.
- Safety Gear: When drilling plastic, resin, or wood, protect your eyes with Anti-Fog Safety Glasses and your lungs with a Respirator Mask.
Expert Verdict: The Gold Standard for Small-Scale Projects
“In the realm of miniature painting and custom fabrication, cheap magnets will ruin hours of hard work. They lose their pull force over time or corrode under paint. The TRYMAG multi-pack solves this by providing industrial-grade neodymium in the exact micro-dimensions hobbyists need. The Ni-Cu-Ni plating is flawless, taking CA glue exceptionally well. Whether you’re magnetizing a $150 resin model or building custom magnetic spice racks, these are the gold standard for small-scale magnetic hardware.” — Lead Curator, Mini Magnet Expert
Final Verdict: Why You Need TRYMAG in Your Toolbox
The Bottom Line: The TRYMAG Small Neodymium Magnets are an absolute necessity for anyone who takes their crafts, models, or home DIY projects seriously. Stop relying on friction-fits, messy glues, or ugly external latches. By integrating these ultra-strong, miniature neodymium discs into your workflow, you elevate the professionalism, modularity, and aesthetic of your work.
They are incredibly potent, beautifully machined, and thoughtfully sized to cover 99% of micro-crafting applications. If you want a reliable, invisible hold that will last a lifetime, look no further.
Ready to upgrade your toolkit and magnetize your next masterpiece?
Frequently Asked Questions (FAQ)
What sizes are included in the TRYMAG small neodymium magnet assortment?
The TRYMAG multi-size kit typically includes micro discs ranging from 1mm–2mm diameter (ideal for small miniature joints and jewelry clasps), 3mm–4mm discs (the workhorse size for Warhammer 40k arms and pegboard accessories), and 5mm+ discs (suitable for cabinet closures and heavier organizational applications). The variety pack eliminates the need to order multiple separate bulk packs for a single complex project.
How do you magnetize a Warhammer 40k model step by step?
- Flatten the joint surface with a precision hobby knife. 2. Mark the center of the joint with a fine marker. 3. Load a pin vise with a drill bit matching the magnet’s exact diameter. 4. Drill a shallow hole to the depth of the magnet’s thickness. 5. Mark polarity on a “master stack” of magnets using a Sharpie. 6. Apply a micro-drop of CA gel glue. 7. Seat the magnet and immediately spray CA accelerator. 8. Repeat for the opposing arm/weapon, confirming polarity before gluing.
Can I pause a 3D print mid-layer to embed a TRYMAG magnet?
Yes. In most slicers (Cura, PrusaSlicer, Bambu Studio), you can add a “pause at layer” command at the exact height of your magnet void. When the printer pauses, drop in the TRYMAG magnet and resume. The nozzle will print directly over the void, permanently encasing the magnet. Ensure your magnet void is 0.2mm larger than the magnet’s actual diameter to account for first-layer squish and thermal expansion.
How should I store small neodymium magnets safely?
Store TRYMAG magnets in a non-magnetic compartment box (a plastic tackle box or bead organizer works perfectly). Keep them away from pacemakers, magnetic storage media (old HDDs, credit cards), and mechanical watches. Never store stacks of loose magnets in a single pile — use dividers between sizes to prevent them from forming a large, unwieldy super-stack that is dangerous to separate.
Are these magnets strong enough to hold tools in a workshop?
While the smaller 1mm-3mm magnets are designed for crafts, the 5mm and larger discs in the TRYMAG assortment have significant pull force. They are perfect for holding lightweight metal tools like drill bits, hex keys, and precision screwdrivers. For heavy hammers or power tools, you would need much larger, thicker magnets, but for bench-top organization, these are ideal.
Do neodymium magnets lose their strength over time?
High-quality neodymium magnets like those from TRYMAG lose less than 1% of their magnetic flux over a period of 100 years, provided they are kept within their recommended operating temperature (usually below 80°C/176°F). This makes them a “permanent” solution for any project.